Case Studies
Published on Jul. 14th 2023
3D Scanning for Simulation Analysis with the FreeScan UE 11
3D scanning for simulation analysis is a modern and efficient way to speed up reverse engineering. Find out how ATEGROUP used the FreeScan UE 11 to repair a mill part.
3D scanning for simulation analysis is a modern and efficient way to speed up reverse engineering. Find out how ATEGROUP used the FreeScan UE 11 to repair a mill part.
Introduction
In industrial maintenance and repair, accurate measurements are crucial to both address equipment failures and improve operational efficiency. Metrology 3D scanners like the FreeScan UE 11 are ideal tools in these cases, because they can capture accurate, precise 3D data in minimal time. The results can be used for reverse engineering, iterative design, and other CAD-related applications.
This article explores how SHINING 3D partner ATEGROUP aided a customer in repairing a SAG (semi-autonomous grinding) mill through 3D scanning and CAD simulation.
Problem: Damaged Trunnions
ATEGROUP’s customer uses a SAG mill in its value chain, to grind down materials. While few details are disclosed to maintain the client’s anonymity, it’s clear that material preparation is always a crucial part of production. Material quality sets the basis for product quality.
However, the customer identified that their SAG mill was damaged; the materials were leaking out of the machine during the grinding process. They quickly found that the machine’s inlet and outlet trunnions, vital components responsible for material transfer, were cracked.
With materials leaking out of the mill, the team was facing a serious issue. It not only concerned operational efficiency, but employee safety as well.
Solutions: 3D Scanning and Reverse Engineering
To repair the trunnions, the client chose ATEGROUP, a Colombian company providing 3D scanning and reverse engineering services. They utilize a range of SHINING 3D scanners to provide these services.
ATEGROUP set two goals for this project:
● Determine the most suitable technique for reinforcing the trunnions
● Obtain accurate 2D drawings of the trunnions and drive units for production machining
The team went through several steps to achieve these objectives.
3D Scanning
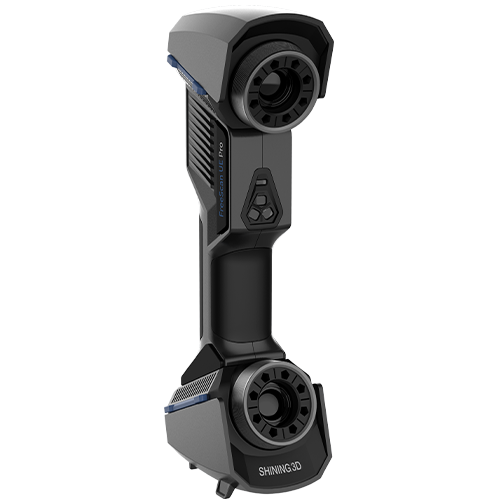
To begin with, ATEGROUP 3D scanned parts of the SAG mill. For large parts around 2.5m to 3m, the 3D scanner’s portability and speed were critical. The team was able to easily 3D scan all around the mill with the lightweight FreeScan UE 11.

Discover the product you're looking for
- Full specifications
- Using scenarios
- Key features
- Even comes with a bundle!
Then, after placing markers on the mill’s metallic surfaces, the team quickly captured additional data with the scanner. FreeScan UE 11 projects 11 crossed laser lines to acquire data at 1.35M points per second.

Reverse Engineering
With the 3D point cloud obtained from the previous step, the team then proceeded to the reverse engineering phase. They processed the scan data and extracted the necessary measurements and geometries with Geomagic Design X.
ATEGROUP meticulously recreated the components in a digital, 3D environment:

This step also enabled the team to export 2D drawings of the model.
Simulation Analysis
Last but not least, ATEGROUP’s engineers performed simulation analysis using the scan-based CAD models to identify the optimal repair solution. Via their simulation software, they replicated the operating conditions and applied stress factors to the digital trunnions.
This allowed them to analyze each component’s behavior under different scenarios, assess potential failure points, and determine the most effective repair method.

Results
With the FreeScan UE 11, ATEGROUP was able to reach their two goals after reverse engineering and simulation analysis:
● Firstly, suggest the most efficient and robust repair solution for the trunnion
● Secondly, provide accurate 2D drawings of the parts for later production
Regarding the first point, the team suggested using an A36 steel liner. This provided the right structural support to address the leakage problem.
Moreover, the detailed and accurate 2D drawings enabled the customer to ensure the proper fabrication of the parts. It saved them significant time and resources compared to manual measurements and drawings. With a 3D scan and the right software, engineers can generate 2D drawings in a few clicks.

Conclusion
Digital simulation is an effective method to provide long-lasting, robust repairs for industrial parts and machines. However, to obtain accurate simulations, accurate 3D data is crucial.
By using the FreeScan UE 3D scanner to capture the SAG mill, ATEGROUP was able to rely on metrology-grade data. As a result, they quickly found the most suitable fix for their customer, who needed to address this critical issue to pick up production again and ensure their employees’ safety.
SHINING 3D’s precise and portable 3D measurement solutions can help you streamline your maintenance and repair processes. Reach out to our application engineers today to see which 3D scanner would meet your requirements.

FreeScan UE Pro
FreeScan UE Pro equips high-precision, metrology-grade accuracy and lightweight design while improving the ability to fine-scan and global precision control large-scale workpiece scanning.
- Metrology-Grade High Accuracy
- Global Precision Control
- Multiple Scanning Modes
