Case Studies
Published on May. 14th 2024
3D Scanning Propeller: A Highly Efficient and Economical Method for Inspection
The article focuses on 3D scanning solutions for ship propeller inspection. When a revolutionary tool like the EinScan HX 3D scanner emerged, propeller inspection became simple and efficient.
The article focuses on 3D scanning solutions for ship propeller inspection. Traditionally, inspectors use a pitchometer to record inspection data. However, this method has significant limitations that make the inspection process cumbersome. When a revolutionary tool like the EinScan HX 3D scanner emerged, propeller inspection became simple and efficient.

Figure 1 - SHINING 3D and TrueProp Software offers a Virtual Inspection Bundle that includes the TrueProp inspection software and the SHINING 3D EinScan HX.

Discover the product you're looking for
- Full specifications
- Using scenarios
- Key features
- Even comes with a bundle!
The Importance of Propeller Inspection
The propeller is the heart of a ship, driving its movement through water efficiently. Any imperfections or damage to the propeller can significantly impact the vessel’s speed, fuel efficiency, and overall performance. Hence, regular inspection and maintenance are paramount in the maritime sector.

Figure 2 – Damaged propellers can be inspected and repaired to a better-than-new condition.
Limitations of Traditional Propeller Inspection Methods
Traditionally, propeller inspection involved using a pitchometer to measure the pitch and angle in the blade surface. This data is recorded by the inspection software via sensors and compared to set standard values (typically industry standard values). The inspection software we use in this case is TrueProp by TrueProp Software, LLC, USA.The inspector will also set tolerances according to ISO-484 standard and generate an inspection report.

Figure 3 – Traditional propeller inspection uses specialized measurement tables called pitchometers.
While this method provided insights into the propeller’s condition, it had its drawbacks:
Firstly, considering the time consumption, the pressure face of the propeller is measured at several pre-defined locations. In other words, a pitchometer can only get a certain number of curves on the surface.
Secondly, using a pitchometer may be prohibitive for smaller operators. Digital pitchometer systems for propellers up to 80 inches can cost upwards of $100,000.
Thirdly, using a pitchometer consumed much time and labor because it required dismantling and mounting the propeller onto a specialized table for inspection. Inspectors scan 3 to 4 pairs of propellers roughly a day. Each propeller needs to be scanned and repaired, repeated approximately five times, depending on how bad the damage is.
3D Scanning Propeller for Inspection
Inspection of propellers became much more efficient when inspectors used an EinScan HX 3D scanner instead of a pitchometer to take measurements. By leveraging the next-generation mesh extractions in TrueProp Software’s Virtual Plugin and the existing ISO-484 tolerance reporting in TrueProp, the new process is especially useful for scanning large propellers.
Inspectors use EinScan HX to capture the surface data of the blade and then export the STL file to align with the coordinate system in the GOM inspection software. TrueProp Software can calculate the geometric properties of each blade by importing the data. The operator checks any differences between blades against the inspection standard, enabling them to inspect and analyze the difference between the respective curve and the target value of each blade. Finally, the system generates a report documenting the propeller’s condition in relation to the tolerance class grade.

Figure 4 - Reflective markers help the 3D scanner identify each blade uniquely. Magnetic markers make application and removal of targets easy.
Advantages of Using 3D Scanning Method
Firstly, inspectors can bring the EinScan HX on board for scanning due to its portability. This saves time by acquiring data directly from the propeller surface without disassembling or transporting the propeller to a specialist.

Figure 5 – 3D scanning allows inspectors to examine propellers almost anywhere. Here, a TrueProp technician scans a propeller while the ship is in drydock.
Secondly, the scanner has no limitation on the size of the propeller. And the combined cost of the EinScan HX and TrueProp software is under $30,000, far less than the cost of using a pitchometer.
Moreover, EinScan HX acquires data much faster and with more accurate results (0.04mm accuracy in laser mode).
 Figure 6 – The 3D data of a propeller acquired by EinScan HX.
After obtaining the 3D data of the propeller, the inspector can generate as many curves as he wants on the surface of the propeller in the software, inspecting it in all directions.
 Figure 7 – The resulting 3D scan is post-processed using TrueProp’s Virtual Plugin to mimic the process used by the pitchometer.
 Figure 8 – Sample report from TrueProp Software using a 3D scanned propeller.
Conclusion
In conclusion, the combination of EinScan HX 3D scanner and TrueProp software presents a highly efficient and cost-effective solution for propeller inspection in the marine industry. By adopting this advanced technology, ship operators can ensure optimal performance and safety standards for their vessels.

Figure 9 – The propeller is returned to better-than-new condition after inspection and repair.
Want to experience how the EinScan HX 3D scanner and TrueProp software can help you streamline maintenance and optimize ship performance? Contact us for a free demo now!

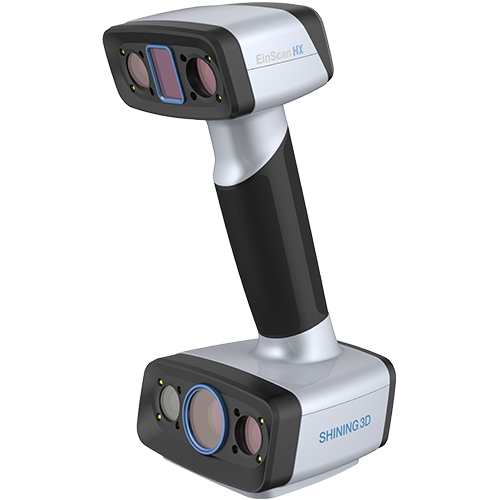
EinScan HX
The EinScan HX’s hybrid laser and LED light sources offer unmatched versatility, accommodating various object sizes effortlessly. With its efficiency and reliable results, EinScan HX unlocks endless application possibilities.
- Material Adaptability
- Reliable Results
- High Efficiency
