Case Studies
Published on May. 23th 2024
A Look at a Full-dimensional Inspection Workflow with 3D Scanning
In this case study, you’ll see what a full dimensional inspection workflow with 3D scanning looks like at a machinery manufacturing company.
About Client
- Company Confidential
- Service Machinery manufacturing
- Need Increase efficiency and accuracy in full dimensional inspection
- Solution SHINING 3D FreeScan metrology solutions
Introduction
In the competitive manufacturing industry, delivery time and production quality are two important factors. Manufacturers constantly introduce new technologies and optimize their management methods to improve production efficiency and product quality.
The most modern manufacturing companies are already upgrading their quality inspection workflow with 3D scanning.
This case study looks at a machinery manufacturing company who has done so by adopting SHINING 3D’s FreeScan metrology solutions. The company integrates product development, mold production, casting, and machining to its services.
Our high-accuracy technology enables them to carry out efficient and accurate dimensional control throughout their entire production process. Let’s see why and how!

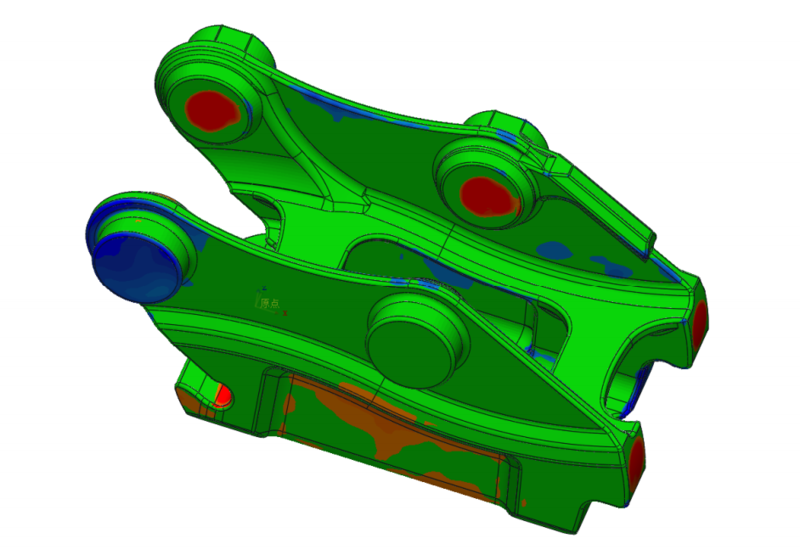
Color map to identify deviations on a part inspected with the FreeScan UE Pro.
Why Efficiency Matters
Part of our client’s business is providing machinery manufacturing casting products abroad.
It first produces an initial prototype and then ships it to its foreign customer for validation. If the customer is satisfied with the sample, the customer validates a batch production order.
Hence, it’s essential to send a perfect first article promptly to win subsequent bulk orders from them.
The manufacturing company thus turned to high-accuracy 3D scanning to perform more thorough quality checks and get their prototypes shipped out faster. They chose 3D Metrology Solution for this important task.

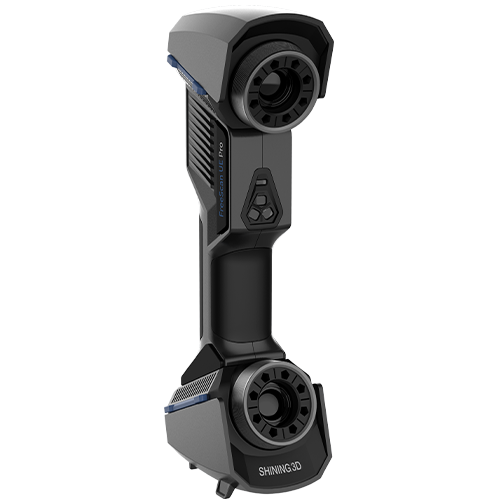
An engineer 3D scanning with the FreeScan UE Pro

Discover the product you're looking for
- Full specifications
- Using scenarios
- Key features
- Even comes with a bundle!
Quality Inspection Workflow With 3D Scanning
The manufacturer’s workflow goes as follows:
1) CAD design: The design team makes a prototype CAD design according to the customer’s needs.
2) Mold production: The production team uses the CAD model to make a mold for the prototype.
3) 3D inspection of the mold: The quality team then inspects the mold with the FreeScan UE Pro and inspection software to ensure its conformance with the original CAD design. It can effectively identify any dimensional deviations and use the data to correct the CAD file if needed.
4) Production of the prototype: If the mold complies, then the production team launches the production of the prototype.
5) 3D inspection of the prototype: The quality team can inspect the final prototype and validate its dimensional accuracy before shipping it to the customer.
By integrating 3D scanning technology into its quality inspection workflow, the company is able to guarantee higher quality standards. This is a key competitive advantage in a relatively saturated market.

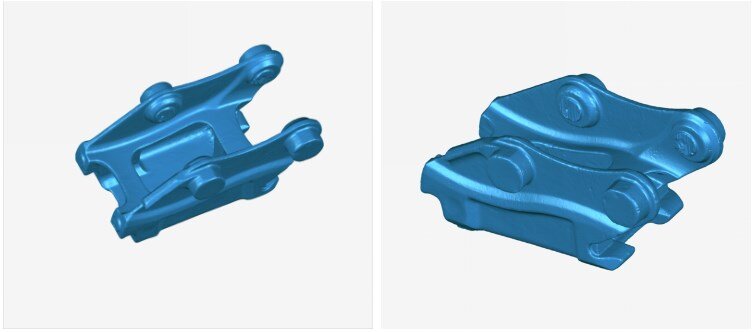
3D point cloud data of the scanned prototypes
Why Choose The FreeScan Series From SHINING 3D?
Handheld 3D scanners from the SHINING 3D FreeScan series, like FreeScan UE Pro, are ideal candidates for 3D inspection for several reasons.
The first is of course their high accuracy. They can reach an accuracy of up to 0.02mm, ideal for demanding metrology projects.
*Note: The FreeScan Series is ISO 17025 certified, following VDI/VDE 2634 Part 3 standards. This involves evaluating detection error performance based on traceable sphere diameter measurement data. Measurements are conducted from multiple perspectives within the working range using traceable length standards to assess sphere-to-sphere spacing errors. Volumetric accuracy can also be further optimized through build-in photogrammetry.
As handheld devices, FreeScan 3D scanners also offer portability and versatility. The technician or engineer only needs to plug the FreeScan UE Pro into a power outlet and to a computer, and then point and shoot at the surface.
These devices can 3D scan products of different shapes, sizes, and materials. The FreeScan UE Pro can even capture highly reflective materials (e.g., shiny metal) without requiring mattifying powder.
Visit our 3D Metrology Solution page to learn more about these 3D scanners’ key features and specifications.
Conclusion
With cutting-edge technology like 3D scanning, manufacturing service providers can have a significant competitive advantage. They can set their quality standards higher and deliver faster, tighter fits right from the first prototype.
“I was deeply impressed when we went to a foreign customer’s site and they used their 3D scanner to perform 3D inspection. The customer’s inspection report was almost exactly the same as ours! Our customer was very satisfied, and so were we.”
-Chairman at the manufacturing company
Are you ready to upgrade your quality inspection workflow with 3D scanning? Contact our team today to see how the FreeScan Series can meet your requirements.

FreeScan UE Pro
FreeScan UE Pro equips high-precision, metrology-grade accuracy and lightweight design while improving the ability to fine-scan and global precision control large-scale workpiece scanning.
- Metrology-Grade High Accuracy
- Global Precision Control
- Multiple Scanning Modes
